Overview
In this article we will review how to enter a resident payment, itemize a payment and edit a payment.
Entering a Resident Payment
Step 1: Open a new tab and go back to the 'Quick Actions' button and click on Manage Payments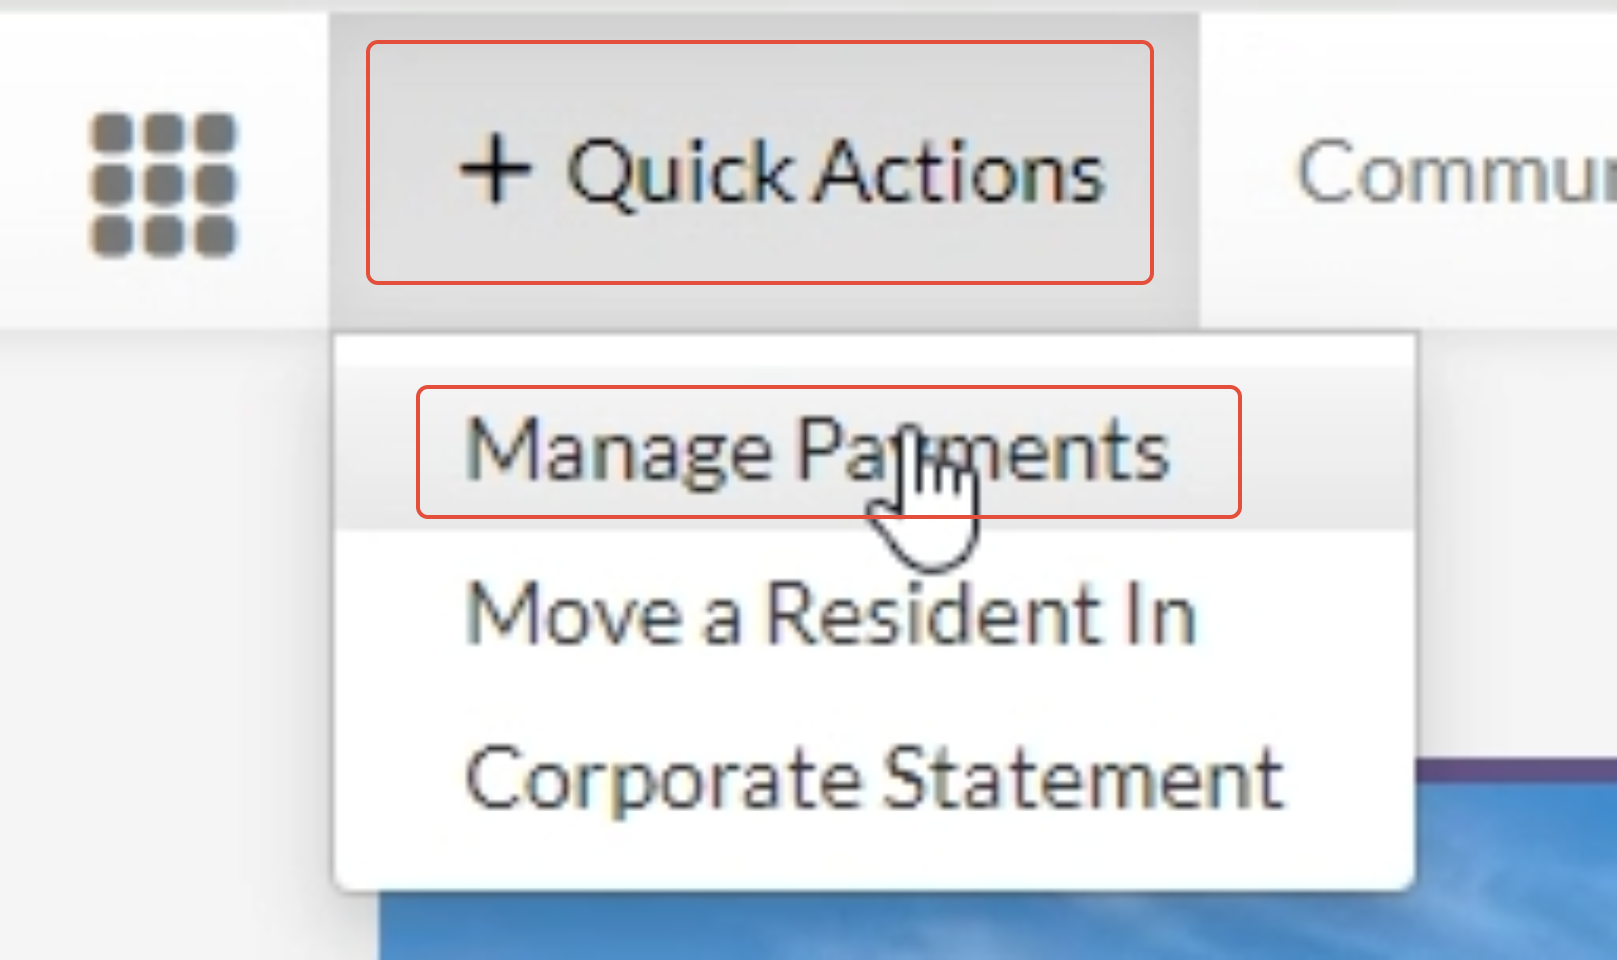
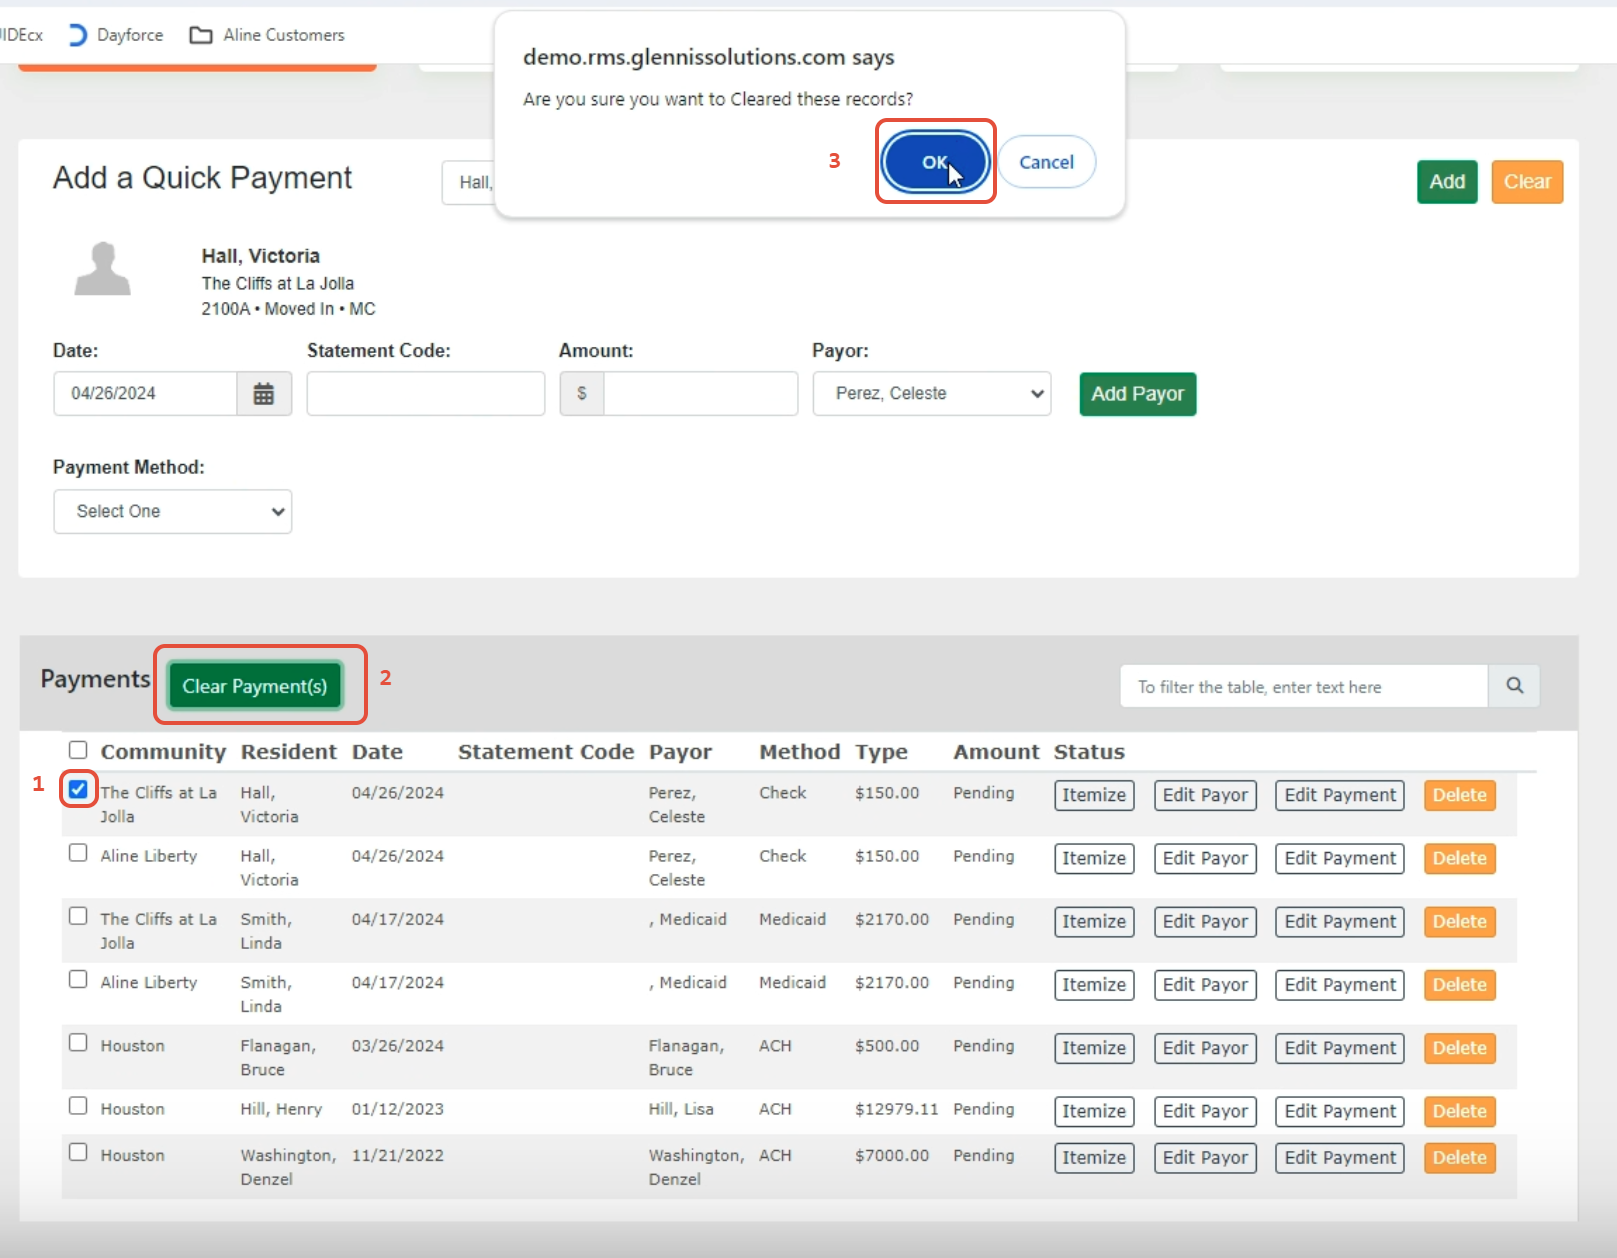
Step 2: A new screen will appear where you can add the residents name next to the 'Add a Quick Payment' option

Step 3: Once the name is selected, you can enter in the date, amount and payment method

Step 4: Once the information is added, you can click on the 'Add' button which will fall below in the Payments list

Step 5: Once completed, you can click the box next to the payment, Click clear payments button, then click ok.
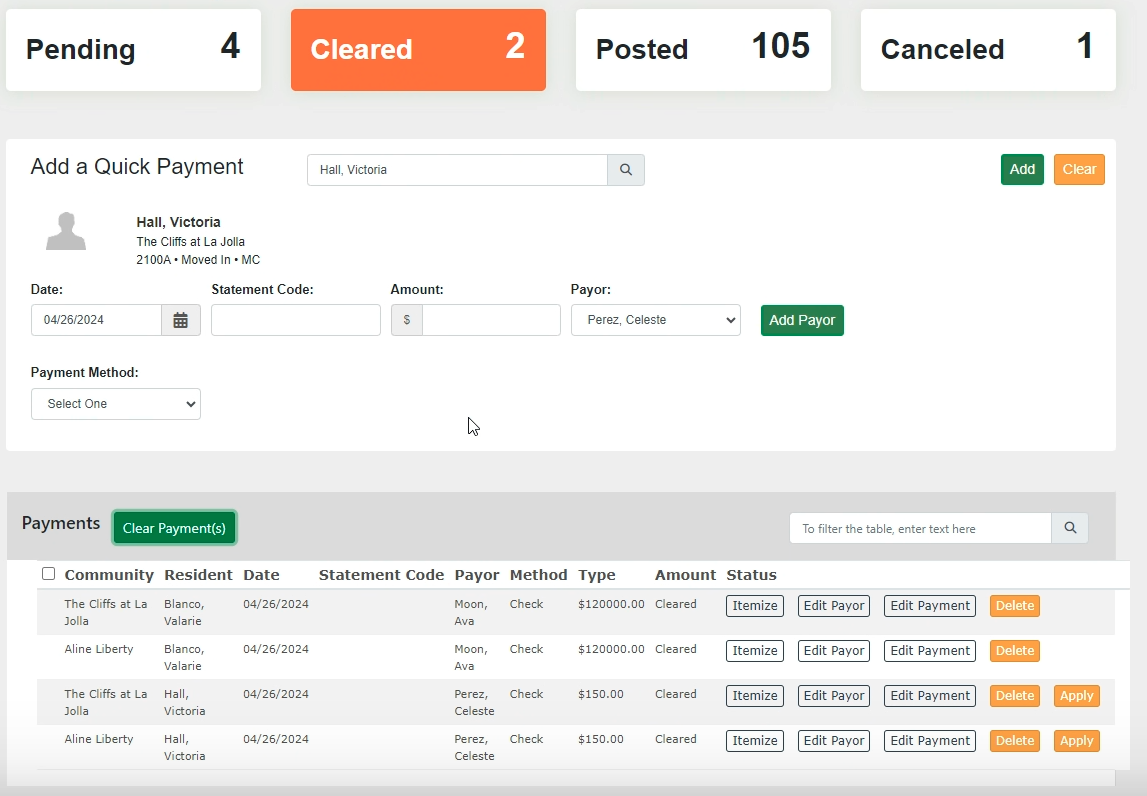
Step 6: The payment will be under the cleared section. Once a payment is cleared, it is eligible to post in the next 15 minutes auto-post batch.
Itemizing Payments
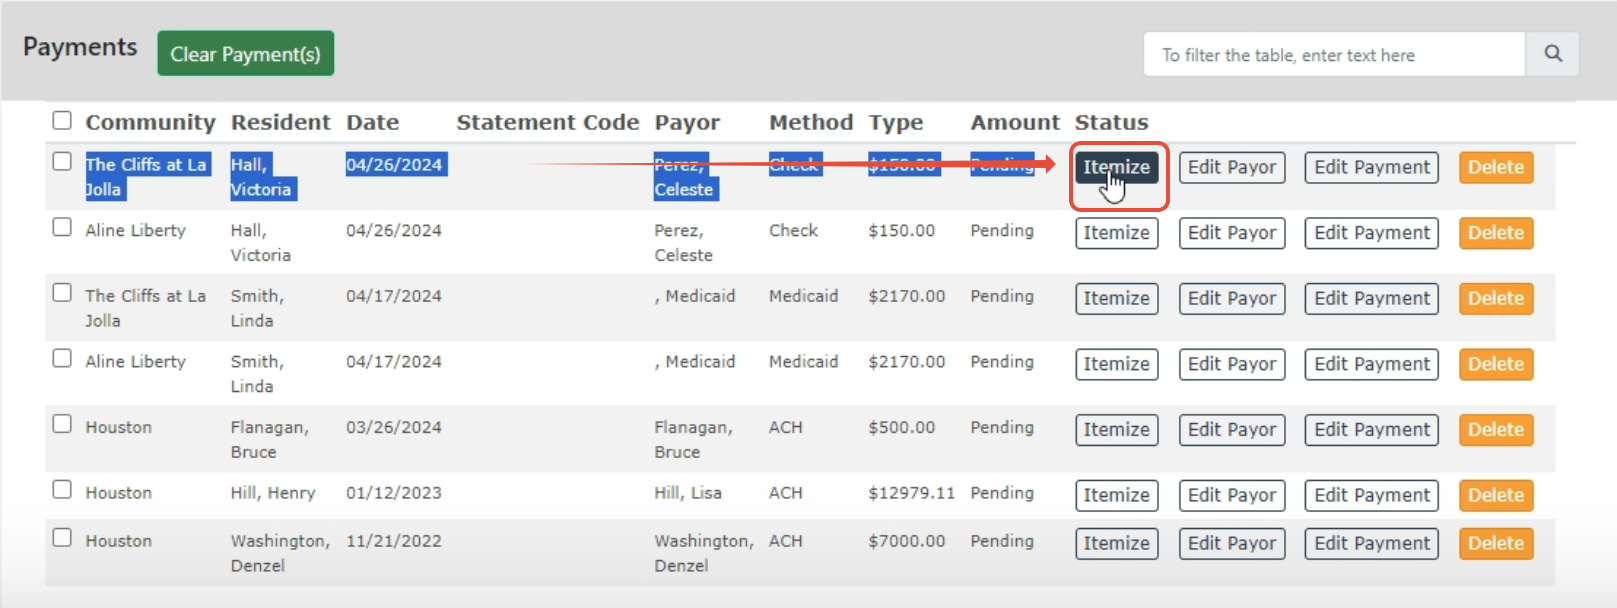
Step 1: Once you have completed a payment, you will have an option to itemize the payment. Click on the Itemize button under the payments section.
Step 2: A new screen will populate to apply the payment to outstanding balances.
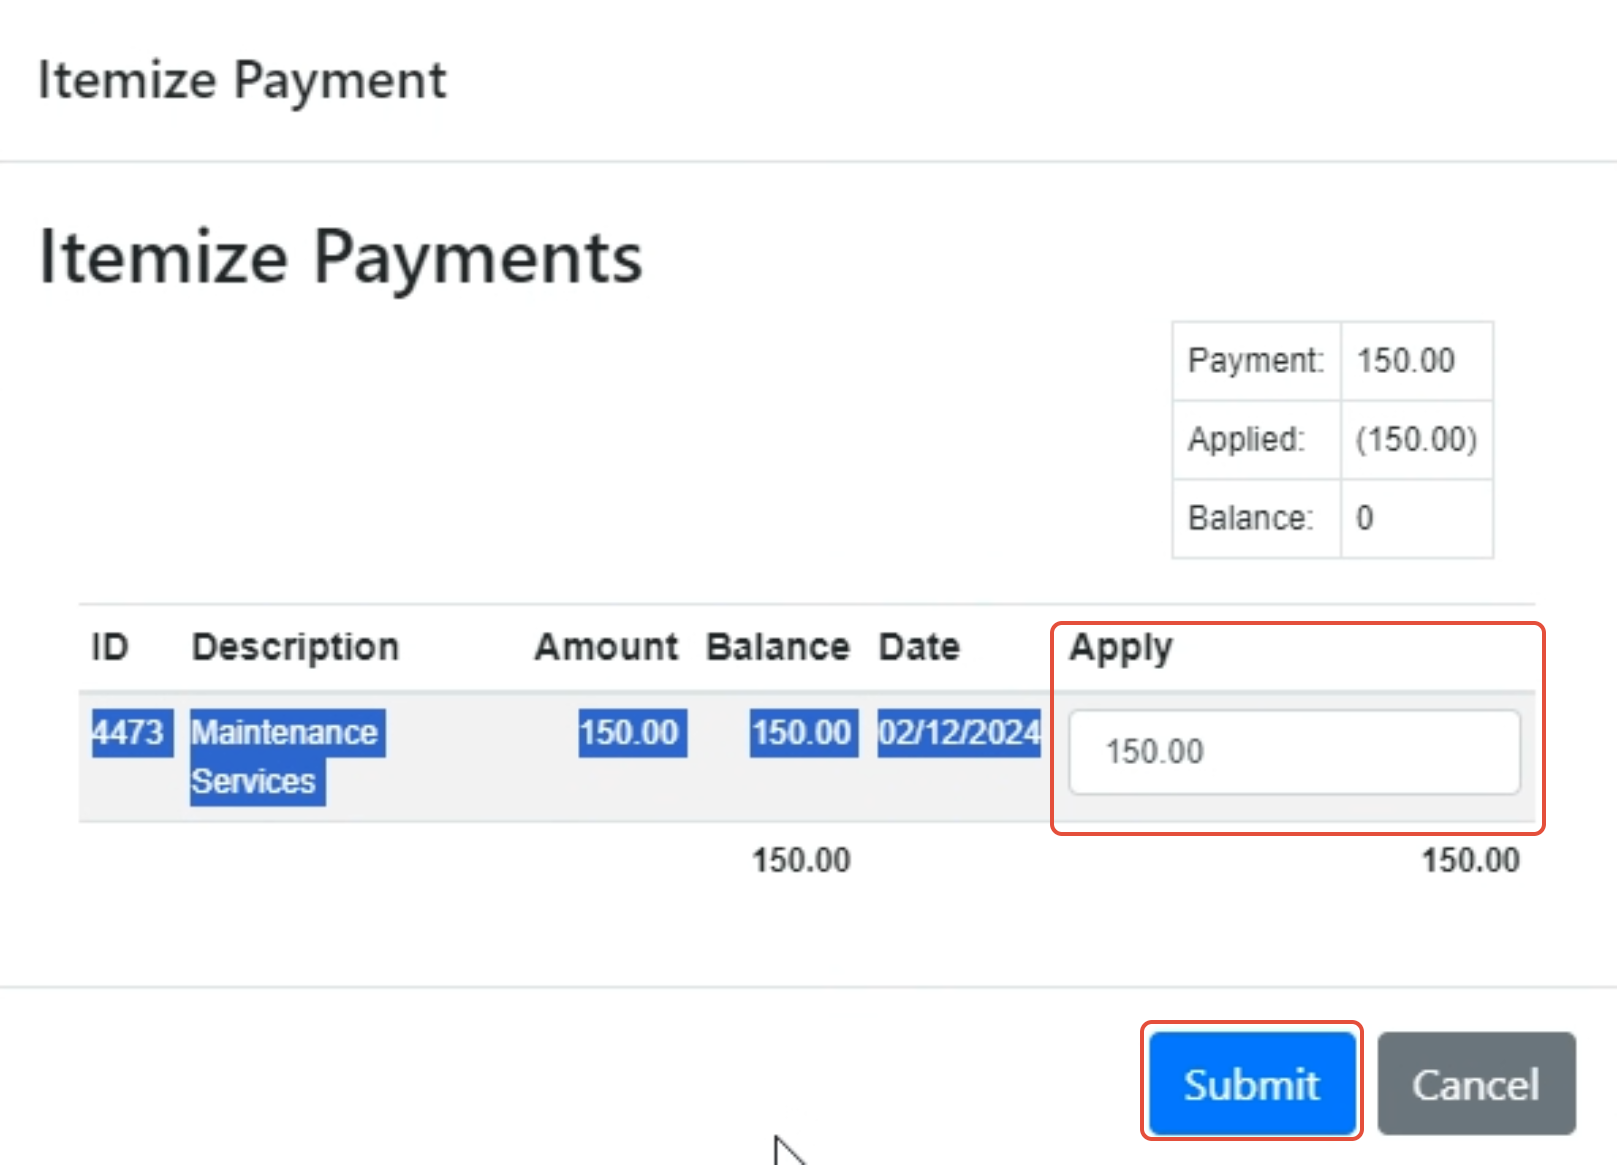
Step 3: Once the information is filled out, go ahead a click submit.
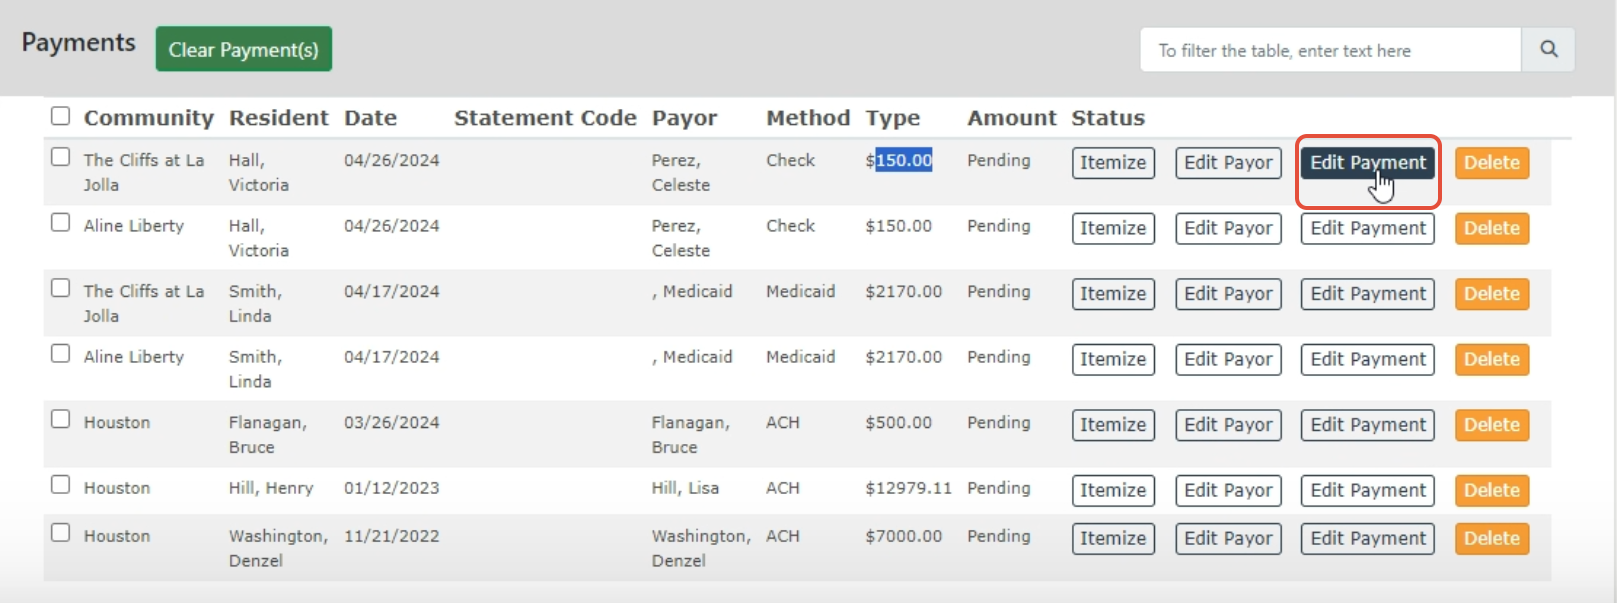
Edit a Payment
Step 1: Click on Edit Payment button
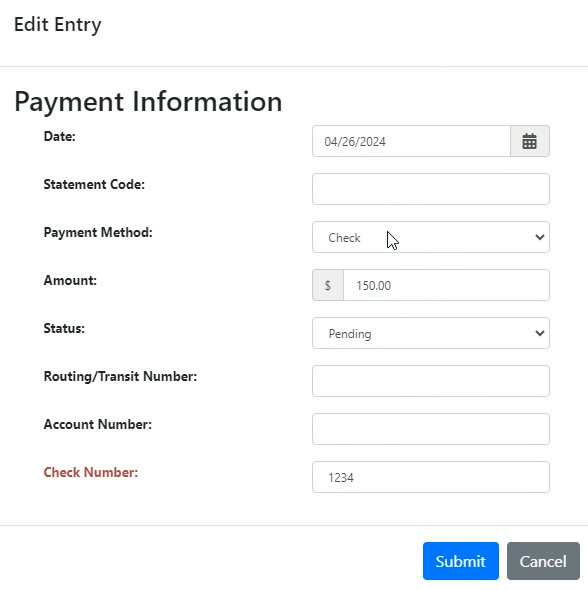
Step 2: A new screen will populate to edit the information
Step 5: Once completed, you can click the box next to the payment,
Was this article helpful?
That’s Great!
Thank you for your feedback
Sorry! We couldn't be helpful
Thank you for your feedback
Feedback sent
We appreciate your effort and will try to fix the article