Overview
In this article, we'll dive into the specifics of how to use the Other Billing Quick Entry tool available to all users within the Aline Leasing & Billing application.
Other Billing, items outside the scope of a resident's room & board and care services, can be added to a resident's ledger by accessing the Other Billing tool located on their resident profile. However, if many Other Billing items need to be added to multiple residents, the most efficient way to do so is with the Other Billing Quick Entry tool.
This tool allows for multiple entries for multiple residents all in one place!
Steps to Use Other Billing Quick Entry
Step 1: After signing into the Aline Leasing & Billing application, select the Waffle Menu and then select Other Billing Quick Entry.

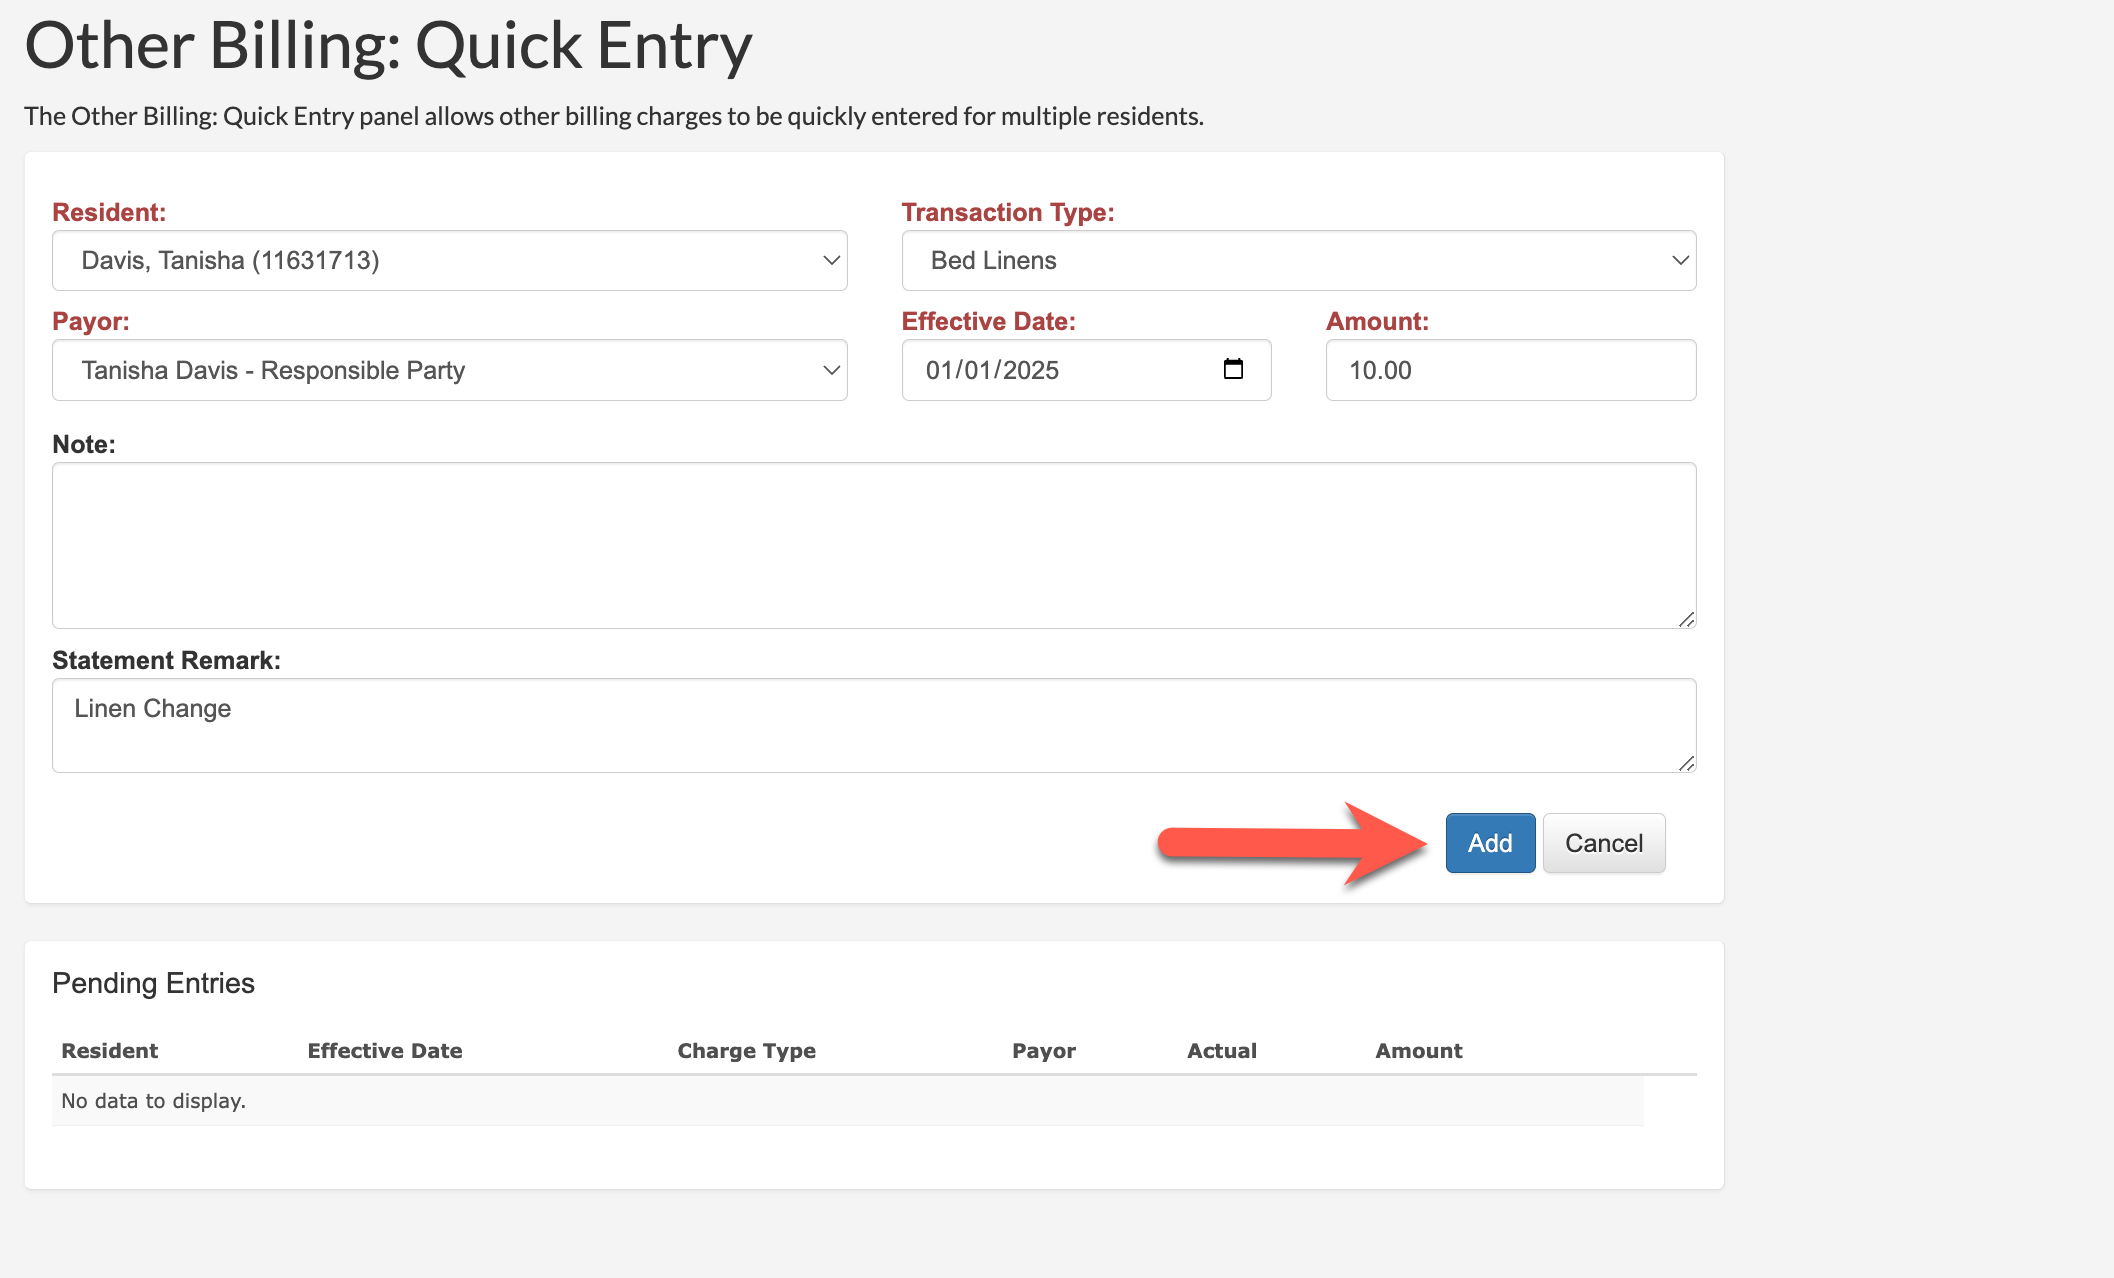
The Other Billing Quick Entry tool will display.

Step 2: Select the desired Resident that requires Other Billing.
Step 3: Select the desired Transaction Type.
Step 4: Assign a Payor.
Step 5: Select an Effective Date.
Step 6: Enter an Amount if required. Some Other Billing items may have auto-entered amounts.
Step 7 (optional): Enter a Note or Statement Remark as needed.
Step 8: Select Add.
Step 9: The item will enter the Pending Entries list, as see below. Repeat steps 2 - 8 as many times as needed until all Other Billing items have been added to the Pending Entries list. While the entires are in the Pending Entries list, they can be deleted by selecting the red box or edited by selecting the blue edit icon.
Select Submit to submit all Other Billing items.

Was this article helpful?
That’s Great!
Thank you for your feedback
Sorry! We couldn't be helpful
Thank you for your feedback
Feedback sent
We appreciate your effort and will try to fix the article