Overview
In this article, we will review community billing.
Steps for Community Billing
Step 1: select the appropriate community.
Step 2: Click the Community tab at the top of the Resident Management homepage.

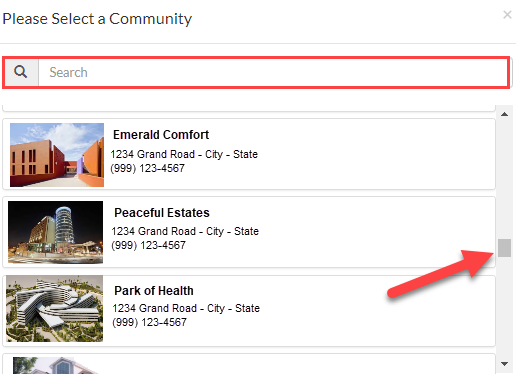
Step 3: Use the Please Select a Community window to find the appropriate community.
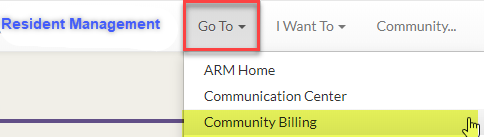
Step 4: Once on the Community page, click the Go To tab, then select Community Billing.
Revenue Management
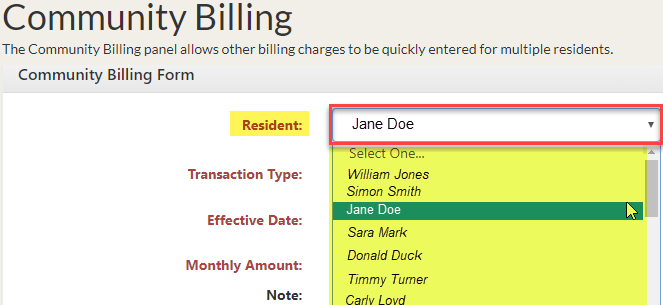
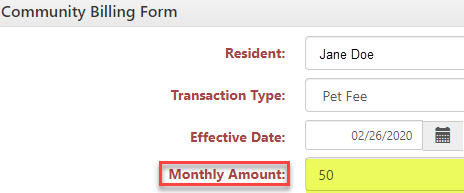
Step 5: Use the Community Billing Form to enter other billing changes for multiple residents.
Step 6: Select the appropriate resident from the Resident drop-down.
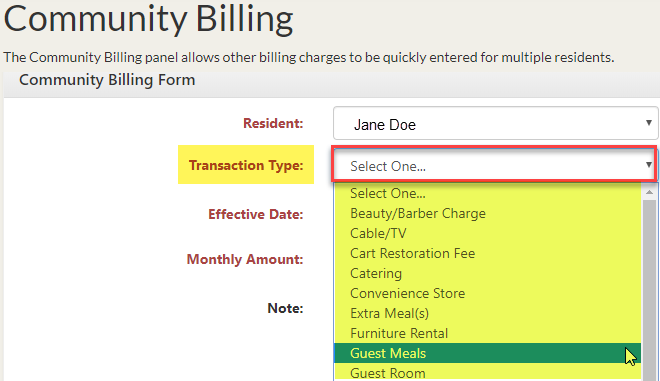
Step 7: Select the appropriate Transaction Type from the drop-down.
Step 8: Enter the Effective Date on which the resident is to be billed for the transaction.

Step 9: Enter the Monthly Amount the resident is to be billed for the transaction.
Step 10: Click Submit when finished.

Step 11: After submitting the Community Billing Form, the entry will appear under Pending Entries.

Step 12: To Edit or Delete an existing entry click the appropriate box next to the entry.

Step 13: Repeat this process for all residents receiving other billing charges.
Billing Videos
Was this article helpful?
That’s Great!
Thank you for your feedback
Sorry! We couldn't be helpful
Thank you for your feedback
Feedback sent
We appreciate your effort and will try to fix the article